
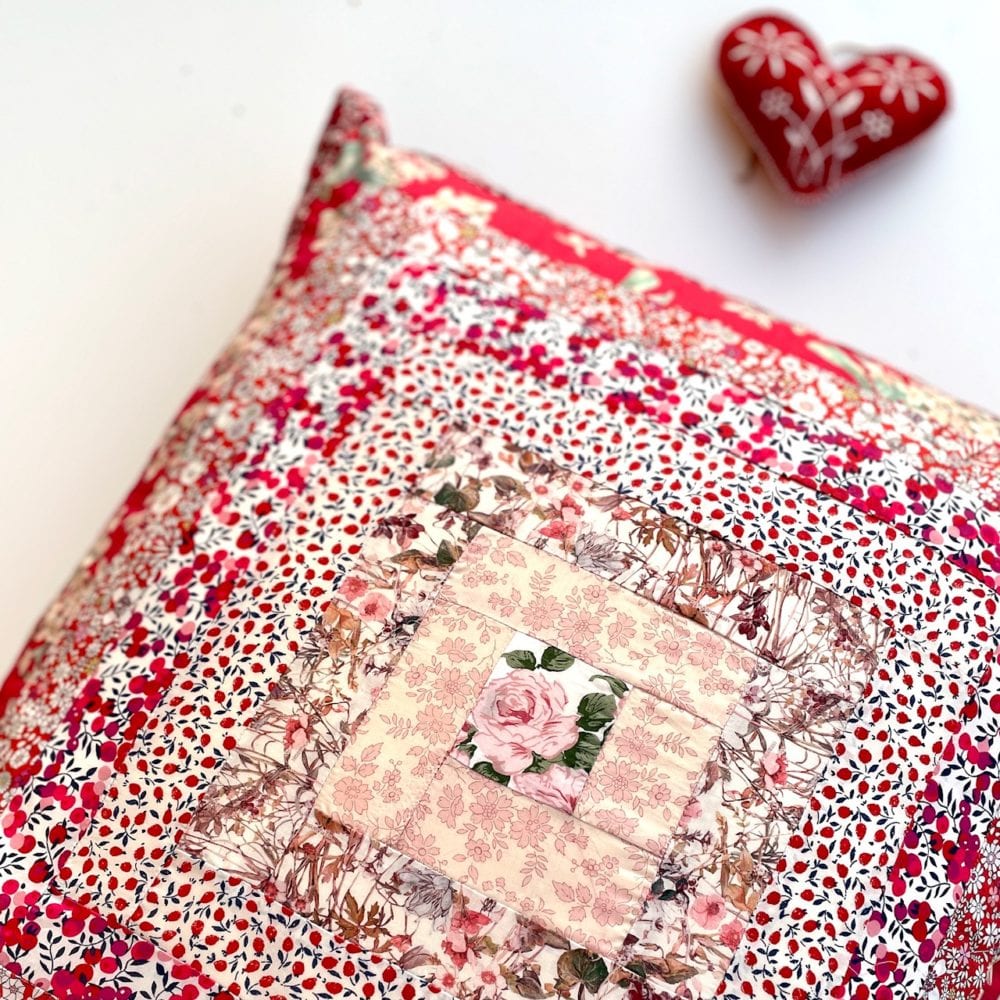
Anna has made this Christmas Log Cabin Cushion using strips of pink and red Liberty fabric. It’s graded from light in the centre to dark colours around the outside of the cushion. Each ring of the log cabin uses one fabric which gives a lovely finish to the cushion. Anna has written up a tutorial for you should you wish to give this easy sewing technique a go.

Log Cabin tutorial – makes a 20″ square cushion cover:
“I simply started with a 2.5” square of fabric in the centre and chose fabrics that graded from light to dark as I worked outwards. It’s a really simple make and a super fast one too – especially if you are running short of time before Christmas. Here’s the tutorial for how to make this Christmas Log Cabin Cushion.
You will need:
1 x 2.5″ (6.35cm) square of Liberty fabric for the centre
7 strips of Liberty Tana Lawn 2″ (6cm) wide varying in length. The first ring of fabrics will need approximately 16″ (41cm) of fabric, the second ring of fabrics needs approx 28″ (71cm) of fabric, the third ring of fabrics needs approx. 38″ (96.5cm), the fourth ring of fabrics needs approx. 48″ (123cm) of fabric, the fifth ring of fabrics needs approx. 59″ (150cm) of fabric, the sixth ring of fabrics needs approx. 68″ (173cm) of fabric. The final ring of fabrics need approx 78″ (198cm) of fabric.
Backing fabric: 20″ (51cm) x 28″ (71cm) of a matching Tana Lawn fabric – cut 2 pieces 14″ (35.5cm) x 20″ (51cm)
22″ or 20″ cushion pad depending on how ‘stuffed’ you like your cushions to be.
How to:
- Take your 2.5″ central square piece of fabric and one strip of fabric (from the first ring of fabrics). Align one edge of the smaller square piece at the top of one long fabric strip edge. Sew with right sides together along the length that these two pieces are joined. Press open and trim long fabric strip level with the smaller piece.
- Work in a clockwise direction and repeat step one on the next side of the square and first strip.
- Repeat step 1 on the third side and strip.
- Repeat step 1 on the final side along the full edge.
- Repeat steps 1-4 with fabrics 2-7 forming each ring around the outside of central square. Your cushion top is finished.
- Make the envelope back of the cushion. Take one piece of backing fabric sized 14″ x 20″. Fold and press 1/4″ on one long side. Fold another 1/4″, press and sew. Repeat with the other piece of backing fabric.
- Place your cushion top right side up on a flat surface. Place both pieces of backing fabric on top of the cushion front with the sewn edges overlapping at the centre. Sew around all four edges of the cushion. Turn right side out through the opening in the centre. Press. Your cushion is now finished.

“I’ve really enjoyed making this Liberty Log Cabin Christmas cushion. It’s been really fun to try a different way of making a log cabin cushion. I’ve only ever made log cabins before where it uses different fabrics on each side of the square. The use of fabric in this way gives a completely different look to the cushion. I’m looking forward to this decorating my sofa this festive period.”

I hope that you have enjoyed this tutorial and that it inspires you to make something beautiful this festive period.