
Nick was working in the studio when he came up with this great idea of making Lovely Liberty Boxes to fill a tricky space. You can find the inspiration and tutorial below.
So, it turns out that finding a storage solution that is functional, cheap and aesthetically pleasing is a very hard task indeed- especially when the shelf you intend to put them on has very odd dimensions and nothing standard seems to fit! This is just the problem Nick was having at the same time he was helping out in the office at Alice Caroline.
Looking around the studio he was inspired and had a light-bulb moment of genius. He could achieve his perfect cheap but beautiful storage boxes through some handy DIYing! Nick put his engineering brain to the task and came up with a method of making his own storage boxes out of the cardboard left-overs from the Clearance Tana Lawn and Poplin Small Pieces Packs. The small piece fabrics that make up these packs arrive pre-cut and sandwiched between cardboard for safe keeping. Usually, the cardboard is simply placed in the recycling bin but for this project the cardboard is smartly re-purposed. It just goes to show how creative one can be when approaching the subject of waste materials. To top it all off, Nick has also used the fabric from a Small Piece Pack to decorate the outside of the boxes as well as fabric from a Ribbon/Strips Scrap pack to sew the boxes together!
Nick’s DIY Storage Box is a fun project that can be easily replicated with materials you have at home.
You will need:

Thick, strong cardboard (Nick recommends using waste cardboard to keep the project more eco-friendly)
Liberty Fabric Tana Lawn and Poplin Small Piece Pack and Liberty Fabric Ribbon/Strips Scrap pack.
Ruler, PVA glue, brush, pencil, Stanley knife, bradawl (or any alternative stabby, pointy object) and a large hand sewing needle
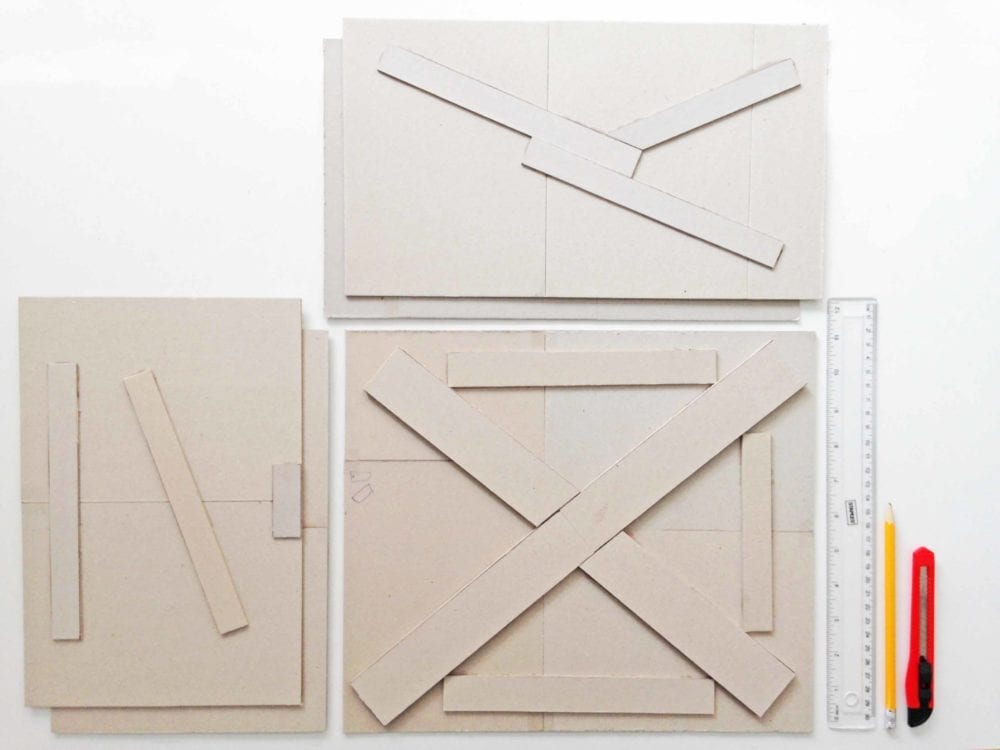
Firstly, work out what size you would like your boxes to be and use the PVA glue to piece the cardboard together so you have a base and four sides in your required dimensions.
Strengthen the cardboard walls by laying strips of cardboard diagonally across the base and walls. Glue these strips in place.

Secondly, use the ruler to measure and mark points about 3cm wide evenly across all four edges of the base piece. Measure out the same for three sides of the walls, leaving the top edge alone. Ensure the marks are alternating across joining pieces as they will be sewn together in a zig zag formation. Then, punch holes where the marks indicate using the bradawl.

Thirdly, and most fun, decorate the flat sides! Use the PVA glue and brush to decoupage fabric from the Tana Lawn and Poplin Small Piece Pack onto the outer cardboard sides of the walls. Do not decorate the base piece. You can cut the fabric into strips of varying sizes as Nick has done or you can choose to do whatever takes your fancy. Be as creative as you like with this step!

Next, add a fabric ribbon handle on the centre of the front side. Use the bradawl to punch two holes in the middle about 14cm apart, thread the fabric ribbon though and tie it into a pretty bow.
Finally, sew the sides together using a ribbon of fabric in a zig zag formation as shown. The side of the cardboard base with the supporting strips should be facing downwards. The zig zag stitching method helps give the joining edges of the box strength. When your fabric ribbon runs out, simply tie a new piece onto it from the inside of the box and continue sewing.
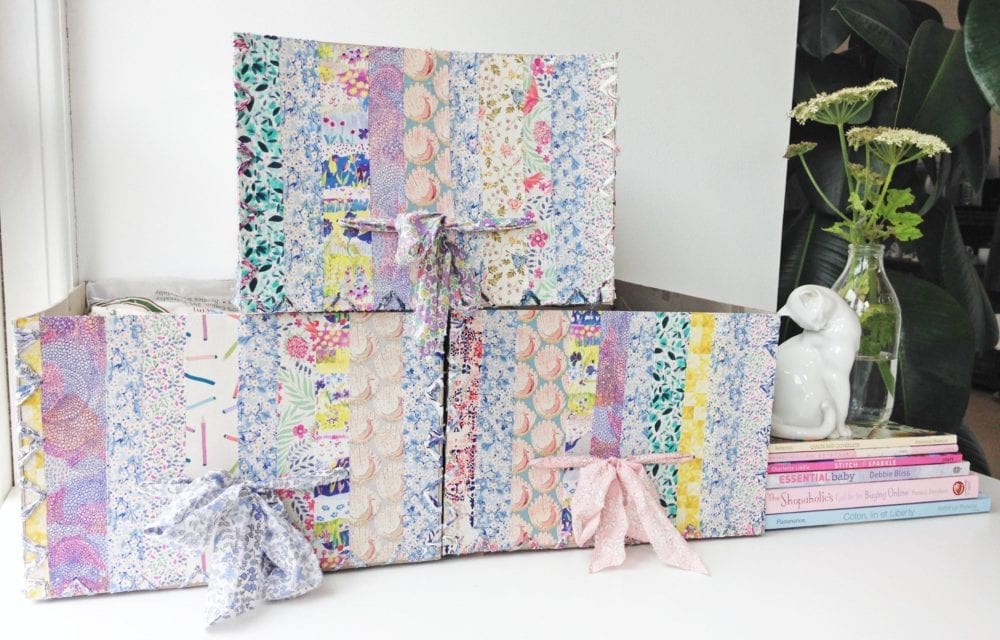
Voila! You can now fill your handmade storage boxes with all sorts and admire the beautiful Liberty fabric at the same time.
Nick crafted 3 boxes to fit on his shelves and has made one clever design choice to really make them look like they are a part of a matching set. He has repeatedly used the light blue Mitsi Valeria print fabric which is decoupage’d across all 3 boxes sides multiple times. You will notice that all the other prints are used just once per side and it is this design choice that ties the 3 boxes together oh so perfectly.
Pretty and practical- you can’t go wrong!

Thanks Nick for sharing your clever idea. You can never use too much Liberty in the home!